
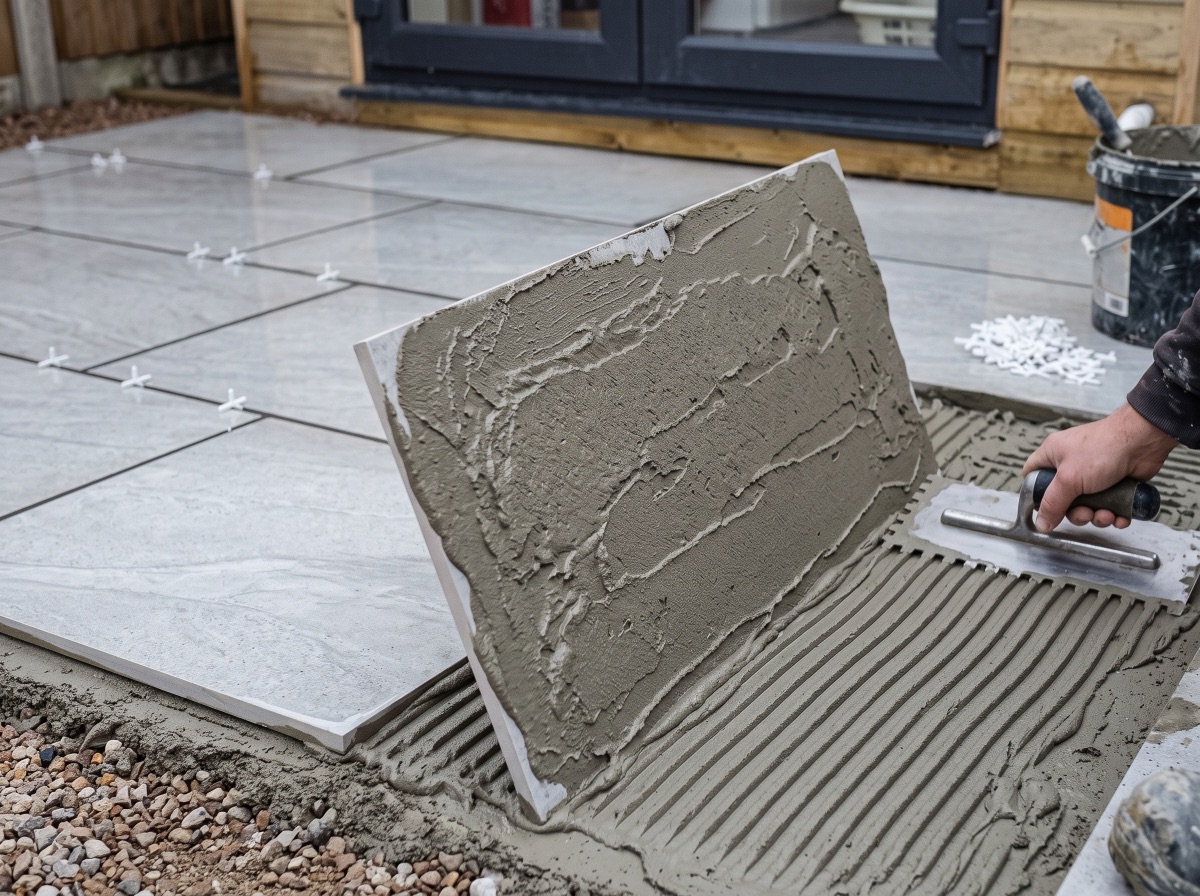
Porcelain absorbs almost no water, so it needs either a priming slurry over a full mortar bed (the standard patio method) or a flexible, exterior-rated cement-based tile adhesive — class C2, ideally S1 deformable — when bonding to a concrete slab. Standard indoor tile adhesive will fail outdoors.
Porcelain's near-zero porosity is why adhesive choice matters: nothing mechanical for a bond to key into, so ordinary methods that work for stone or concrete slabs let porcelain debond. There are two correct systems. On a mortar bed (the standard garden build-up), the "adhesive" is a cement-based priming slurry brushed onto the slab back. On a sound concrete base, use a flexible exterior-rated cement-based adhesive — class C2, ideally S1 deformable — applied as a solid bed.
System 1: Priming slurry over a full mortar bed
For patios laid on compacted MOT Type 1 and a semi-dry mortar bed, brush a porcelain priming slurry (cement-based bonding slurry, or an SBR-modified equivalent) onto the back of each slab immediately before laying. The slurry is the bond bridge between non-porous slab and mortar — skip it and slabs can lift clean off an otherwise perfect bed. This is the method in the step-by-step laying guide, and it's how the 20mm ranges are intended to be laid in gardens.
System 2: C2 S1 adhesive onto a concrete base
Where you're bonding porcelain to an existing or new concrete slab (steps, thresholds, a driveway build with 20mm porcelain over reinforced concrete), use a cementitious tile adhesive rated for exterior porcelain. On the bag, that reads as:
- C2 — improved cementitious adhesive (the adhesion class porcelain needs; C1 is the basic class).
- S1 (or S2) — deformable: tolerates the thermal movement outdoor slabs live with.
- Exterior / frost-rated — stated for outdoor use, not just "floor tiles".
- F (fast-set) variants — optional: shorter working time, earlier trafficking; useful in cool UK weather, less forgiving for first-timers.
Reputable UK manufacturers all make adhesives meeting this spec — match the label codes rather than a brand name, and follow that manufacturer's primer guidance for your base.
What not to use
- Standard indoor tile adhesive — not frost-rated, wrong flexibility; the classic first-winter failure.
- Dot-and-dab / spot bonding — five dabs under a slab leave voids that crack under point loads, hold water, and telegraph as ghost stains on the face. Solid bed only, whichever system you use.
- Plain mortar with no primer — fine for sandstone, a debonding lottery for porcelain.
Applying adhesive correctly (System 2)
- Prepare the base: concrete must be cured, clean, dust-free and primed per the adhesive manufacturer's instructions.
- Solid-bed the adhesive: trowel onto the base with a notched trowel, and back-butter the slab so the combined bed is void-free at the manufacturer's stated thickness.
- Bed the slab: lay, then tap down with a rubber mallet, pushing slightly across the ribs to collapse the trowel lines.
- Check coverage early: lift your first slab back off — you want effectively full contact on the back. Adjust technique now, not at slab forty.
- Respect the cure: keep traffic off per the datasheet before jointing.
Choosing between the systems
- Garden patio on soil: System 1 — build the ground properly (ground prep guide), full mortar bed, priming slurry.
- Existing sound concrete slab: System 2 — C2 S1 exterior adhesive, solid bed.
- Driveway: a structural decision first — 30mm porcelain on an engineered base, or 20mm on reinforced concrete with System 2 (see the thickness guide).
- Cracked or flaky old concrete: neither — fix the base first; adhesive doesn't rescue bad substrates.
Work out your exact order in seconds
Our coverage calculator turns your patio size into the precise number of slabs and packs — 10% waste allowance included.
Free delivery, £0.98 samples, breakage guarantee
Every order ships free with no minimum spend. Order a £0.98 sample first, choose your delivery date, and if a slab arrives broken we replace it — no quibbling.
Frequently asked questions
Do porcelain paving slabs need adhesive?
They need a bonding system, always: a cement-based priming slurry on the slab back when laying onto a mortar bed, or a C2-class flexible exterior adhesive when bonding to a concrete base. Porcelain laid on plain mortar with neither can debond.
Can I use normal tile adhesive outside?
No — indoor tile adhesive isn't rated for frost or outdoor movement and typically fails within the first winters. Look for exterior-rated, C2 (ideally S1 deformable) cementitious adhesive.
How thick should the adhesive bed be for porcelain paving?
Whatever the manufacturer specifies for the slab format — applied as a solid bed (notched trowel plus back-buttering) with effectively full contact and no voids. Spot bonding is never acceptable.
Is rapid-set adhesive better for outdoor porcelain?
It's better for the schedule, not the bond: same adhesion class, shorter working time and earlier foot traffic — handy in cool, showery UK weather, but less forgiving if you're slow setting out.
Do I need a primer with porcelain adhesive?
On the base, follow the adhesive manufacturer's primer guidance for your substrate. On the slab, the priming-slurry step applies to the mortar-bed system; with a C2 adhesive the back-buttering does that job.