
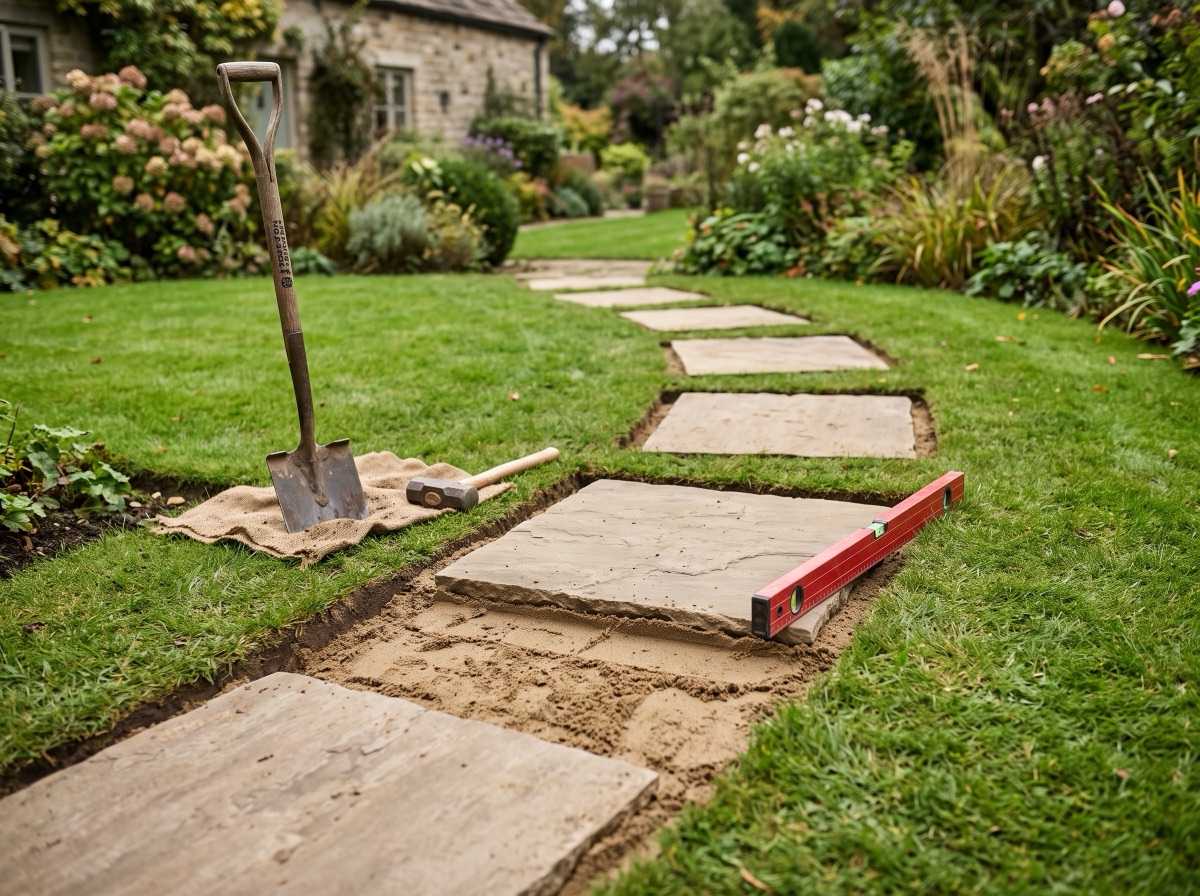
You should never lay paving slabs directly onto bare soil — it settles, holds water and moves with frost. Instead, excavate ~150mm, compact the ground, add 100mm of compacted MOT Type 1 and bed the slabs on a full mortar bed. Here is the complete method, plus the no-cement alternative.
The short answer: don't lay slabs straight onto soil. Bare ground settles unevenly, holds water and heaves with frost, so slabs laid on it rock, sink and crack — usually within a season or two. The proper method is to excavate, compact the ground, build a compacted MOT Type 1 sub-base and bed each slab on a full mortar bed. It takes a weekend longer and lasts decades.
Why soil alone fails
Topsoil is full of organic matter that decomposes and compresses; it also swells when wet and shrinks in drought. Any slab sitting on it follows those movements. A sub-base spreads point loads, drains freely and doesn't change volume — that's the whole trick to paving that stays flat.
Tools and materials
- Tools: spade and mattock, wheelbarrow, string lines and pegs, tape, spirit level (and a long straightedge), plate compactor (hire), rubber mallet, trowel, and a wet saw or angle grinder with a diamond blade for cuts.
- Materials: MOT Type 1 sub-base, sharp sand and cement for the bedding mortar, priming slurry if you're laying porcelain, and jointing compound or mortar for the joints.
- Safety: gloves (wet cement burns skin), eye and ear protection, and a dust mask for any dry cutting.
Work out quantities first with the coverage calculator — it converts your area to slabs and whole packs with a cuts-and-breakage allowance built in.
Step 1: Mark out and check your levels
Set string lines at the finished paving height, building in a fall of at least 1:80 away from the house (that's 12.5mm of drop per metre). If the paving meets a wall, the finished surface must sit at least 150mm below the damp-proof course.
Step 2: Excavate to firm ground
Dig out around 150mm below your finished level across the whole area — all the topsoil, roots and vegetation must go. If you hit soft, spongy pockets, dig them out too and fill with sub-base material. What's left should be firm subsoil you can walk on without sinking.
Step 3: Compact the exposed ground
Run the plate compactor over the exposed subsoil in two passes. This finds any remaining soft spots now, while they're still cheap to fix. Clay ground that pumps water when compacted needs extra sub-base depth, not less.
Step 4: Build the sub-base
Spread MOT Type 1 in layers no thicker than 50–75mm, compacting every layer, until you have at least 100mm of compacted depth (150mm+ on clay or for anything a vehicle will cross). Rake it to follow your falls. Done right, the surface is tight enough that you can't kick stones loose.
Step 5: Bed the slabs on mortar
Mix sharp sand and cement at about 4:1 to a moist, semi-dry consistency. Trowel out a full bed 30–50mm thick — never five dabs of mortar ("spot bonding"), which leaves hollow voids that crack slabs and drum underfoot. If you're laying porcelain, brush a priming slurry onto the back of each slab first so it bonds (see the full laying guide). Tap each slab down to the line with a rubber mallet.
Step 6: Space, align and check as you go
Keep joints consistent at 8–10mm (spacers help), check every slab against the string line and spirit level, and step back every few courses to sight the falls. Correcting one high slab now beats relaying a run later.
Step 7: Joint the paving
After the bed has firmed up (24–48 hours), fill the joints with a brush-in jointing compound or a pointing mortar — the grouting guide compares the methods. Unfilled joints let water into the bed and weeds in from above.
Laying slabs on soil without cement
For a path or stepping stones that only take foot traffic, there is a legitimate no-cement method: excavate and compact as above, build the same compacted Type 1 sub-base, then bed the slabs on a 25–30mm screeded layer of sharp sand (or grit) and fill the joints with kiln-dried sand. It's easier to lift and relay, but expect more settlement and weed pressure than a mortar bed — it's the right trade-off for light-duty areas only, and it is still never "slabs straight onto soil".
Common mistakes to avoid
- Leaving topsoil or roots under the sub-base — the number-one cause of sinking.
- Skipping the fall, so water ponds against the house.
- Spot bonding instead of a full mortar bed.
- Laying porcelain without a priming slurry.
- Leaving joints open "to finish later" — later never comes, weeds do.
Choosing the slabs themselves
Porcelain gives batch-consistent colour and no sealing; natural sandstone gives genuine stone character at a lower upfront price — the comparison guide covers the trade-offs, and the flagship Kandla Grey range comes in both materials. Order a sample before you commit a full pallet.
Work out your exact order in seconds
Our coverage calculator turns your patio size into the precise number of slabs and packs — 10% waste allowance included.
Free delivery, £0.98 samples, breakage guarantee
Every order ships free with no minimum spend. Order a £0.98 sample first, choose your delivery date, and if a slab arrives broken we replace it — no quibbling.
Frequently asked questions
Can you lay paving slabs directly on soil?
No. Slabs laid straight onto soil sink, rock and crack as the ground moves with moisture and frost. Excavate about 150mm, compact the ground, add at least 100mm of compacted MOT Type 1 sub-base and bed the slabs on a full mortar bed.
How do I lay paving slabs on soil without cement?
For light-duty paths only: excavate and compact the ground, build a compacted MOT Type 1 sub-base, screed 25–30mm of sharp sand over it, bed the slabs into that and joint with kiln-dried sand. Expect more settlement than a mortar bed — never place slabs straight onto bare soil.
What depth do I dig out for a patio?
Around 150mm below finished level for foot traffic: 100mm+ of compacted MOT Type 1, plus a 30–50mm mortar bed, plus the slab thickness. Driveways need 150–200mm of sub-base.
How do I make sure the slabs are level?
Work to string lines set at finished height with a 1:80 fall, check each slab with a spirit level in both directions as you tap it down, and sight along the surface every few courses.
Do I need a fall on a patio?
Yes — at least 1:80 (12.5mm per metre) away from the house or any wall, so rainwater runs off the surface instead of pooling or tracking back to the building.
How long before I can walk on newly laid slabs?
Keep off the paving for 24–48 hours so the bedding mortar can set, then joint it and follow the jointing product's curing time before normal use.