
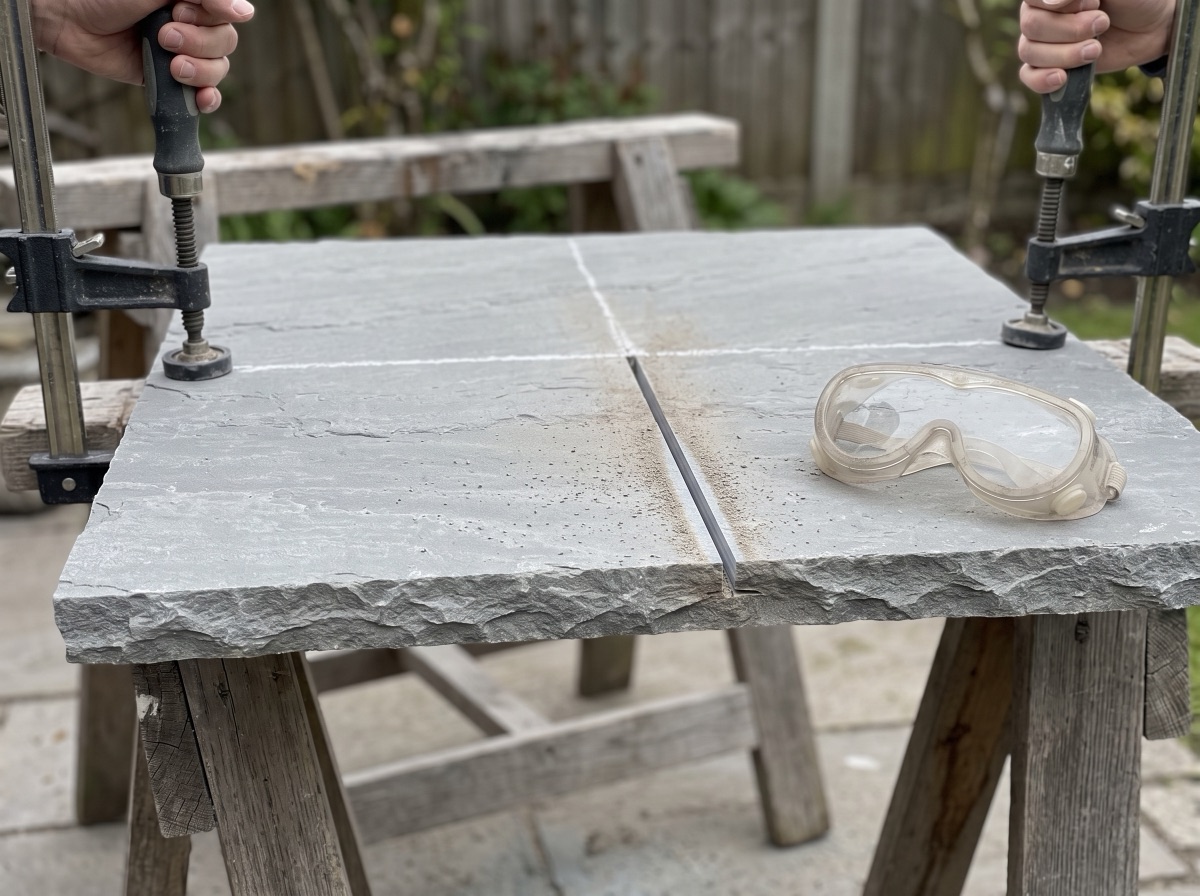
For clean cuts in paving, use an angle grinder or cut-off saw with a continuous-rim diamond blade and water suppression — score first, cut in passes, and finish from the face side. Porcelain demands a porcelain-rated blade and patience; never dry-cut without extraction: the dust is the real danger.
Perfect cuts come from the blade, the water and the patience — in that order. A continuous-rim diamond blade matched to your material, wet cutting (or proper on-tool extraction), a scored first pass and a slow feed will give clean edges in porcelain or natural stone with tools you can hire for a weekend. Rushing any one of those is where chips, cracked slabs and — more seriously — silica-laden dust come from.
Safety first, because this one's real
Cutting concrete, stone or porcelain releases respirable crystalline silica — dust fine enough to scar lungs permanently, and the reason professional sites treat dry cutting as a disciplinary matter. The controls are simple and non-negotiable:
- Cut wet (water fed to the blade) or use on-tool dust extraction; if any dust still escapes, wear an FFP3-rated mask — a nuisance dust mask is not protection.
- Eyes and ears: impact-rated glasses or a visor, and ear defenders — a cut-off saw is genuinely loud.
- Gloves and boots, obviously; slabs are heavy and edges are sharp.
- Work clear of others — especially downwind — and never remove a blade guard.
Choose your tool
- Angle grinder (115/230mm) with a diamond blade — the versatile default: straight cuts, notches and curves. A 230mm grinder cuts most 20mm porcelain in one or two passes; deep sandstone may need cutting from both faces.
- Cut-off saw / petrol disc cutter with water feed — the trade choice for volume: faster, deeper, and the water kills the dust at source. Hire one for a driveway's worth of cuts.
- Bridge saw / wet tile saw (paving-rated) — the precision option for porcelain: a sliding bed and constant water bath give factory-quality edges and mitres. If your project has many visible cuts, this is the hire that pays for itself in finish quality.
- Hammer and bolster — traditional for riven natural stone and setts, where a slightly rustic split edge suits the material. Never for porcelain: it doesn't split, it shatters.
Choose the right blade
The blade matters more than the machine. Use a continuous-rim diamond blade for porcelain — segmented and turbo blades cut faster but chip brittle vitrified edges; the best results come from blades specifically rated for porcelain. For sandstone, limestone and concrete products, a general-purpose segmented or turbo diamond blade is fine and faster. Check the blade's rated speed matches the tool, and replace glazed-over blades — a dull diamond blade chips edges and overheats slabs.
Step 1: Measure and mark
Measure twice off the laid grid (not off the previous slab, or errors accumulate), mark the cut line on the face with a pencil and straightedge, then run masking tape along the line on porcelain — it reduces surface chipping and makes the line easy to see when the water starts flying. Plan which side of the line the blade's width (the kerf) falls on.
Step 2: Support the slab properly
Lay the slab on a firm, flat, cushioned base — rigid foam sheet or a sacrificial timber bed — with the cut line clear of the supports so the offcut can drop away without pinching the blade or snapping early. Never cut a slab bridged between two bearers at its ends: it will break before you finish the cut.
Step 3: Score the line first
Make a shallow first pass — a few millimetres deep — along the whole line. This scored channel guides every later pass, takes the tension out of the surface, and is the single biggest difference between a chipped edge and a clean one on porcelain. Keep the blade square to the face throughout.
Step 4: Cut in steady passes
Deepen the cut in two or three passes rather than forcing one, letting the blade's weight and speed do the work — pushing hard overheats the blade and chips the edge. On thick sandstone, cut as deep as the tool allows from the face, then flip and finish from the back; the scored face edge stays crisp. Porcelain rewards an almost lazy feed rate: slow is smooth, smooth is sharp.
Step 5: Finish the edge
Ease the fresh edge (its corner is glass-sharp on porcelain) with a few light strokes of a diamond hand pad or rubbing stone. Cut edges belong where they're least seen: against walls, borders and risers — factory edges face the open joint (the complete patio guide covers layout planning so cuts land in the right places, and the steps guide applies the same rule to treads).
Curves, notches and holes
For curves, make a series of straight relief cuts up to the marked line, snap out the fingers, then dress the curve smooth with the grinder. For notches (around posts, corners, inspection covers), cut the two sides then slightly over-cut in the waste to release the corner cleanly — or finish the internal corner with a hand pad rather than over-running the visible face. Circular holes want a diamond core bit, drilled wet, from the face side.
Material-specific notes
- Porcelain: continuous rim, wet, taped line, scored pass, slow feed — and accept that a bridge saw gives the best edge of all. Its density is why it cuts slowly and why the results look factory-made when you don't rush (background in the thickness guide).
- Indian sandstone: cuts fast and forgivingly; riven faces vary in thickness, so let the blade follow the marked face line. A hand-split bolster edge can look right on rustic laying styles (see the sandstone guide).
- Never cut slivers: any piece under about 100mm wide looks wrong and breaks in service — adjust the layout to share the cut across two slabs instead. The coverage calculator's wastage allowance exists because cutting always consumes stock.
Work out your exact order in seconds
Our coverage calculator turns your patio size into the precise number of slabs and packs — 10% waste allowance included.
Free delivery, £0.98 samples, breakage guarantee
Every order ships free with no minimum spend. Order a £0.98 sample first, choose your delivery date, and if a slab arrives broken we replace it — no quibbling.
Frequently asked questions
What is the best tool to cut paving slabs?
An angle grinder with a continuous-rim diamond blade handles most jobs; a water-fed cut-off saw is faster for volume; and a bridge/wet saw gives the cleanest edges in porcelain. Match the blade to the material — that matters more than the machine.
How do you cut porcelain paving without chipping it?
Use a porcelain-rated continuous-rim diamond blade, cut wet, tape and score the line first, then deepen in slow passes with a light feed. Finish from the face side and ease the cut edge with a diamond hand pad.
Can you cut paving slabs with an angle grinder?
Yes — a 115mm grinder suits notches and trims, a 230mm cuts most 20mm porcelain and much natural stone, cutting from both faces on thick slabs. Use the correct diamond blade, water or extraction for dust, and full PPE.
Do you need to cut paving slabs wet?
Cut wet whenever possible: water suppresses the silica dust that makes dry cutting genuinely dangerous, keeps the blade cool and improves the cut. If you must cut dry, use on-tool extraction and an FFP3 mask — a basic dust mask is not adequate.
How do you cut a curve in a paving slab?
Mark the curve, make straight relief cuts up to the line so the waste falls away in fingers, then dress the curve smooth with the grinder. For holes, use a diamond core bit drilled wet from the face.
Why do my paving slabs crack when cutting?
Usually unsupported cutting (the slab pinches the blade or snaps under its own weight), forcing the cut in one deep pass, or a worn/wrong blade overheating the slab. Support the slab on a flat cushioned base with the line clear of the bearers, score first and cut in passes.